If you'd like to download a pdf copy of this tutorial, click HERE.
Technique Tutorial
Designer Buttons
Designer Buttons
You’ll need:
· Designer Series Paper - DSP (I’ve used Stampin’ Up! Designer Series Paper “Parisian Breeze”)
· Your desired punch (I’ve used the Stampin’ Up! 1/2” Circle Punch)
· Anywhere Glue Stick
· Paper Piercing Tool
· Sanding block
· Crystal Effects
Punch four* circles from a sheet of DSP and glue together in a stack. Alternatively, punch one circle of DSP and 3-4 of coordinating cardstock and glue with the DSP circle on the top.
* If your DSP/cardstock is thin, you will need to use more circles.
Step Two
Using your paper piercing tool and a button as a guide (optional), pierce 2 or more holes through your stack of DSP circles. Make sure you have a suitable surface underneath so you don’t damage your working surface.
Step Three
Using the sanding block (or an emery board), lightly sand the edges of your DSP circle stack. This is to help the stack of circles to look more like a solid unit. Your choice of DSP and cardstock will affect the final look of your button.
The DSP I’ve used for this tutorial has a white core, so the joins between each layer are more obvious. You could use a marker to ink the outside edge if this was a problem.
Apply Crystal Effects to the top of your button, being careful to not fill the pierced holes. It’s also a good idea to apply a small amount of Crystal Effects to the edges of the button to help bind it all together. Do this as a separate step.
Step Five
Your button is now complete and ready to be used!
Make sure the Crystal Effects has dried completely before using your button to avoid putting fingerprints on it!
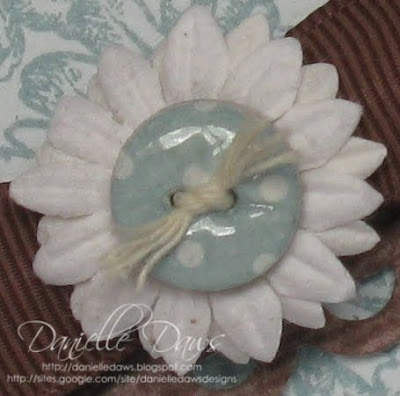
Finished Examples
I hope you've enjoyed my tutorial!


WOW. I love it! I'm always checking out sites and blogs for new ideas. This is definitely a new idea for me. Thanks for putting up the tutorial! I'm off to make me some buttons!!!
ReplyDeleteGreat idea = thanks :D
ReplyDeleteFantastic idea.
ReplyDeleteThese are fabulous Danielle!! I love the use of the DSP!!! THanks so much for your amazing time and effort in sharing this with us!!
ReplyDeleteSMIles SHarnee :0)
Wow great idea, absolutely STUNNING! Thanks for sharing.
ReplyDeleteNancy Lempinen
Do you have a template for the finished box with the matching hand-made button? I love the shape of the box.
ReplyDeleteNancy Lempinen
That is GORGEOUS!
ReplyDeleteThis tutorial is fab. Love it. Something simple but very effective with crystal effects.
ReplyDeleteLiam
I love it, have had a bottle of crystal effects in my cupboard for ages but never used it. I will be now. Thanks for sharing.
ReplyDeleteOh, me encanta! Thanks for sharing amiga! Gracias por compartir!
ReplyDeleteWhat is DPS?
ReplyDeleteDesigner Series Paper...:0)
Delete